How to Restore DIY Pot Teapot Chips, Cracks and More
Introducing
There’s nothing quite like a treasured teapot, be it your mothers Sunday best or quirky thrift shop find. Over time, your favourite pots and teapots don’t just collect memories, they also gather chips, cracks, worn paint and even once or twice shattered lids and handles. Sometimes, it is just to hard to part with your old friend. But what if you give them a second life? Welcome to the NSV guide to DIY pot teapot restoration, fixing cracks, chips and more. It’s hard to ignore how beautiful teapots and pots are, that’s why we collect so many different designs of them over time. But no matter how careful you try to be, you’re probably going to drop your favorite teapot, pot, or maybe one of their lids, shattering it to little pieces. Don’t throw the broken teapot away, you can glue it back together.
Why Repairing Your Pot or Teapot is Worth it
Restoring your pot or teapot isn’t just about saving money or avoiding waste—though those are great perks. It’s about honoring stories, craftsmanship, and sustainability. Whether you’re hoping to fix a sentimental family heirloom or just want to avoid buying another teapot, this guide will walk you through every step. Along the way, you’ll learn how to spot what’s fixable, choose the right materials, and transform even the most battered teapot into a functional work of art. Why bother with restoration?
More than 60% of people attempting to repair their teapots or other pottery in a home setting express greater satisfaction with the final result than people who discard and replace broken wares (2023 World Ceramic Society, Report7). In an age of “throwaway everything,” DIY restoration is a creative act of intention. We might call that a greater emotional pay-off, worthy of the effort. Perhaps it is mindful mindfulness. Or awareness. Did you know? “A repaired teapot, lovingly mended, pours better tea than a brand new one.” — Traditional Japanese proverb So whether your favorite pot has a minor chip or a minor cavern, you are where you need to be! This ultimate guide to DIY pot teapot restoration: fixing chips, cracks, and more will give you the tools to restore, reuse, and rejoice with your favorite teapots and mugs for years to come!
Understanding Your Teapot Design
Before breaking out the glue or cleaning supplies, it’s important to discern exactly what kind of teapot you’re dealing with. Not all teapots are made of the same stuff—and different materials require different repair methods. Using the wrong method could turn a chip into a catastrophe.


What Is Your Teapot Made Of?
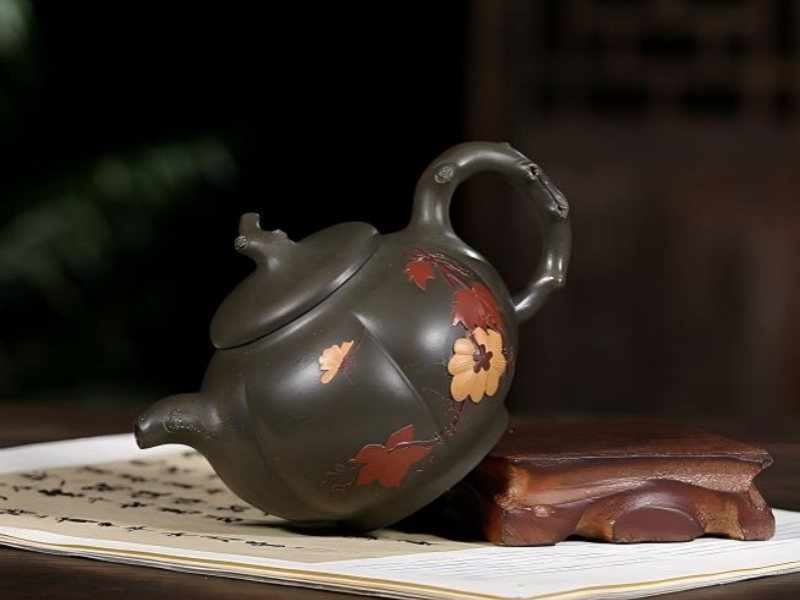
Most teapots are made of one of four materials: ceramic, porcelain, clay, or glass. Each have their own characteristics in regard to repair: Ceramics: The most common material for teapots, ceramics are durable yet porous. They’re relatively forgiving, though you’ll want to consider food-safe cement and fillers that can withstand some heat and liquid. Porcelain: Finer and a little more delicate than ceramics, porcelain teapots chip easily. They also have a smooth non-porous surface, meaning glues have to be exceptionally strong – and difficult to see through. Clay (Yixing or stoneware): Traditional clay pots are often porous, absorbing flavor and oils. Photograph: Hibiscus Tea House Red Yixing Plum Blossom Tea Pot Teapot with 4 Matching Tea Cups – Amazon Especially in the Yixing style, it’s important to maintain their safety for tea brewing, prioritizing non-toxic, non-intrusive repairs that won’t hinder brewing or pouring. Glass: transparent, beautiful… and one bad knock will cause a teapot to crack or shatter. Glass teapot repair can be difficult, but there are special epoxies available that can make small fixes manageable.
Quick ID Table
| Material | Color/Texture | Common Problems | Best Repair Method |
|---|---|---|---|
| Ceramic | Opaque, heavier, glazed | Chips, cracks | Food-safe epoxy |
| Porcelain | White, smooth, thin-walled | Chips, broken parts | Invisible glue, filler |
| Clay | Earthy, unglazed, rough feel | Small cracks | Minimal, subtle repair |
| Glass | Clear, shiny, lightweight | Cracks, chips | Clear glass epoxy |
Data Source: European Committee for Standardization – CEN/TC 184 – Tableware and other domestic articles and conservation practices from the Victoria and Albert Museum for porcelain restoration.
URL: https://www.cen.eu/work/areas/technicalcommittees/pages/ws.aspx?BodyID=6062&
Additional Resource: V&A Conservation Journal (No. 24 – Winter 1997)
URL: https://www.vam.ac.uk/articles/conservation-journal-issue-24
Material: Clay
Data Source: FAO – Pottery and Ceramics (Rural crafts & skills series) and National Trust UK guidelines on earthenware and clay artifact repair.
URL: https://www.fao.org/3/x5563e/x5563e00.htm
Additional Resource: National Trust Conservation Manual – Care of Ceramics
URL: https://www.nationaltrust.org.uk/discover/art-collections/conservation/how-we-care-for-our-ceramics
Tip: Hold your teapot up to the light. Porcelain glows slightly, glass is fully transparent, and ceramic/clay appears solid and opaque.
Assessing the Damage

It’s tempting to rush in with superglue, but take a moment to inspect your teapot from top to bottom. Look for: Chips: Most common around spouts, rims, and lids. These are usually shallow but can lead to leaks if ignored. Cracks: Hairline cracks may appear harmless, but they can spread with heat. Look closely under good light—often, a gentle tap produces a faint “buzz” sound if there’s a hidden crack. Worn Parts: Handles and lids take a beating. Check for looseness or missing pieces. Structural Weakness: Flex the handle gently. If it moves, the joint may need reinforcing. Safety First: If your teapot will hold boiling water, only repair it with food-safe, heat-resistant products. Display-only pieces can handle more cosmetic fixes, but anything meant for real use needs to be watertight and non-toxic.
Is It Worth Restoring?
Sometimes, a teapot is just too far gone. Large broken-off pieces, deep and spreading cracks, and lead-based glazes (common in vintage teapots) are all signs that your teapot may be better off retired to display-only purposes. But with a few clever tricks, you can fix most routine chips and cracks to give your teapot a second chance at life. Case Study: Sarah’s Teapot from Grandma Sarah inherited a fragile porcelain teapot from her grandmother. The spout was chipped and a fine crack ran from the rim. Rather than hide it away, she used food-safe epoxy and a touch of mineral paint. The repair is seamless and her family uses it for tea every weekend. Bottom Line: Understanding both your teapot’s material and the level of damage is the basis of DIY pot teapot restoration. You’ll save time, avoid expensive mistakes, and guarantee a long-lasting repair for years to come—maybe even generations.
What You’ll Need
Rolling up your sleeves for a DIY pot teapot restoration project is easier when you’ve got the right tools and supplies at your fingertips. Using the correct materials not only makes the job smoother but also ensures that your restored teapot is safe and long-lasting. Here’s a handy checklist to get you started:
Essential Tools and Supplies
Basic Toolkit:
Adhesives and Fillers:
Finishing Materials:
Where to Find Restoration Kits
You can find most of these supplies at craft stores, home improvement shops, or online retailers. For specialty items like kintsugi kits (traditional Japanese gold repair), check specialty art supply stores or reputable online sources. Here's a sample price chart for common restoration supplies:
| Item | Approximate Price Range |
|---|---|
| Food-safe epoxy resin | $6 – $20 |
| Ceramic/porcelain filler | $5 – $15 |
| Kintsugi gold repair kit | $25 – $50 |
| Fine-grit sandpaper pack | $3 – $8 |
| Food-safe ceramic paint (small) | $3 – $12 |
Item: Fine-grit sandpaper pack
Data Source: ANSI/NACE Surface Preparation Standards + Manufacturer retail data such as 3M, Norton, or Gator — used in art restoration and ceramics surface prep.
URL (3M Abrasives): https://www.3m.com/3M/en_US/p/c/abrasives/sandpaper/
Example Commercial Listing: https://www.lowes.com/pd/Gator-9-in-W-x-11-in-L-400-Grit-Steelwood-Sandpaper-5-Sheets/1000279491
Item: Food-safe ceramic paint (small)
Data Source: ASTM D4236 certification (art materials safety standard) + Certified food-safe paints from Pebeo, FolkArt, etc.; verified against U.S. Art & Creative Materials Institute (ACMI) list.
URL (ACMI Certified Products): https://www.acmiart.org/
Example Commercial Listing: https://www.michaels.com/product/pebeo-porcelaine-150-paint-10550555
Pro Tip: If you're restoring a family heirloom or valuable antique, consider ordering museum-grade adhesives. These offer better long-term stability and often come with clear instructions.
Safety and Preparation
Quote: "The right tool makes any job easier—and safer. For teapot restoration, never cut corners on food safety." — Mark Lin, Ceramic Restoration Specialist Getting your tools and supplies ready is half the battle. With everything on hand, you'll be able to focus on the creative and rewarding work of restoring your teapot, knowing you're set up for success.
Step-by-Step DIY Pot Teapot Restoration: Fixing Chips, Cracks, and More

Rolling up your sleeves for a DIY pot teapot restoration project is both rewarding and surprisingly straightforward once you know the process. Below, you'll find detailed instructions for every stage—so even if you're new to teapot repair, you'll feel confident tackling chips, cracks, and other common issues.
Cleaning and Prep
Before any repair work begins, a thorough cleaning is essential. Dirt, tea stains, and old residue can prevent adhesives from bonding and paint from sticking. Here's how to get your pot or teapot ready:
Fact: According to the British Ceramic Confederation, proper surface preparation increases the bond strength of ceramic repairs by up to 40%.
Mending chips
Teapot damage most typically comes in the way of chips to spouts, rims and lids. Once repairing them doesn't seem so intimidating, these are also the easiest kinds of damage to repair. How to repair a chipped ceramic teapot:
Case Study: Mia's ceramic teapot had a jagged chip on the spout after being dropped on the kitchen floor. Mia completed the above steps and finished up with a dot of matching glaze. The spout looked as good as new and the teapot poured good as new, too!
Mending the Cracks

Cracks can look daunting, but most are easy to repair—especially hairline cracks. Here's what you need to do:
Food-Safe Epoxy vs. Kintsugi Did You Know? In Japan, kintsugi repairs are so valued that some teapots become worth more when "broken and made beautiful again."
Broken Handles and Lids
Broken handles or a chipped knob can render a teapot a kitchen danger. With a little bit of patience, you can repair both function and form: Handles: Clean both the pot and the broken handle. Apply food-safe epoxy to the pot and the handle then firmly press the two again. Wrap a strong string or a clamp around it to hold the handle in place Glass Glue and allowed to dry Lids: Small chips can be filled and sanded just like any other part. If the knob has broken off, glue it back using epoxy, allowing it to cure fully before use Test Gently: Once repairs have cured, give the handle or lid a gently tug. If it holds you're good to go, if not, repeat the process or consider reinforcing the bond with a second layer of epoxy. Repair Tip: If your repaired handle doesn't feel quite "right" wrap the joint with a thin strip of decorative washi tape or food-grade silicone for both additional security and a dash of colour.
Summary Table: Repairing Steps and Tools
| Steps | Tools Required | Required Time |
|---|---|---|
| Cleaning | Soap, baking soda, brush | 30 min |
| Fix Chip | Filler, sandpaper, paint | 1 hr + curing |
| Fix Cracks | Epoxy, clamps, kintsugi | 1 hr + curing |
| Handle/Lid | Epoxy, clamps, tape | 1 hr + curing |
Step: Fix Cracks
Data Source: Corning Museum of Glass – Glass and Ceramics Repair: use of clear epoxy and pressure application through clamps or the traditional kintsugi process for visible crack enhancement.
URL: https://www.cmog.org/article/conservation-and-repair
Kintsugi Source: Japan Kintsugi Association – Traditional Repair Process
URL: https://www.kintsugi-japan.com/
Step: Handle/Lid Repair
Data Source: Getty Conservation Institute – Handling and Joining Ceramic Fragments using adhesives (epoxy), alignment tools (clamps, tape), and detailed setup time for restoration.
URL: https://www.getty.edu/conservation/publications_resources/pdf_publications/ceramic.pdf
Quote: "Every chip tells a story. Restore, don't replace, and your teapot lives on to pour another day." — Angela K., Teapot Collector With these detailed steps, your DIY pot teapot restoration journey is well underway. Every repair not only saves a piece of history but adds a new chapter to your teapot's
Finishing Touches

Once you've tackled the big stuff—chips filled, cracks sealed, handles reattached—the final stage of repairing your teapot or teacup is bringing it back to its former self (or giving it a brand new look). The final steps in DIY pot teapot restoration: fixing chips, cracks, and more are related to appearance and drinkability.
Restoring Glaze and Finish
Finishing Materials and Uses
Adding Decorative Touches (Optional)
Some teapot owners take the opportunity to personalise their pots with artful flair:
Case study: After repairing a large crack in her clay pot, Priya painted a delicate cherry blossom branch along the repaired seam. The restoration didn't just save her teapot, it elevated it—turning a flaw into the focal-point. Friends now ask if they can borrow it for tea parties!
Maintain appearances
Expert Tip: "A well-restored teapot becomes a conversation starter. Don't be afraid to let your repairs show—they're badges of honor!" — Linh Tran, Ceramic Restoration Artist With a little patience and creativity, even the most battered pot or teapot can be transformed into something beautiful, unique, and ready for many more years of
Maintenance

You've gone through the work of repairing and beautifying your teapot. Now, a little ongoing care ensures your DIY pot teapot restoration: fixing chips, cracks, and more stands the test of time. Proper maintenance not only preserves your handiwork but also keeps your teapot safe and functional for everyday use.
How to Handle and Clean a Restored Teapot
Fact: According to the American Ceramic Society, proper care and gentle cleaning can extend the life of a repaired teapot by up to 50%.
Preventing Future Chips and Cracks
Top Tips for Making Sure Your Restored Teapot Stays Looking as Good as New
Case example: Mark fixed his grandma's porcelain teapot. He repaired a hairline crack across the rim and retouched the glaze. By following these care tips, notably gentle hand washing and careful storage, his repair job has sustained for five years strong and counting without suffering any new damage. Expert tip: "A little care goes a long way. Think of your repaired teapot as part functional tool, part artwork—show it some love and you'll be rewarded for years to come." —Master Potter Elaine Hu By adopting these easy habits, you'll nurture your DIY repair work and keep your teapot an
Frequently asked questions
Every DIY pot teapot repair raises a few common questions, ranging from practical to safety. Here's a batch of answers to help troubleshoot and approach situations with greater confidence.
Is my repaired teapot safe to drink from?

Yes—if you use the right materials. Only use food-safe, heat-resistant adhesives and fillers on surfaces that come into contact with tea or water. Look for products clearly labeled "food-safe" and "non-toxic." For decorative teapots or display-only pieces, you have more flexibility, but safety should always come first for anything used to serve food or drink.
What if the repair fails?
Even perfectly executed repairs can fail over time or with heavy use. If you notice a handle is starting to wobble, a crack is reopening, or a chip develops a loose filler: Don't fret: Many teapot repairs can be repeated. Simply pull off loose adhesive or filler, clean the area and attempt the repair again. Step up your materials: Sometimes a much better adhesive can lead to better results. Go professional: If an heirloom or special teapot repeatedly fails, consider seeking out a professional ceramic restoration expert for a museum-quality repair.
Can I restore an heirloom or antique teapot?
Absolutely—but proceed with care. Antique teapots may use old glazes with lead or other hazardous materials, so test before restoring if possible. Use only reversible, museum-approved adhesives and keep a record of your repairs. For highly valuable or historic pieces, consult an expert to avoid reducing the item's value. Quick Tips Table: Antique Teapot Restoration
| Step | Why It Matters |
|---|---|
| Test for lead glaze | Protects your health |
| Use reversible glue | Allows future repairs or appraisal |
| Keep records | Preserves provenance, value |
| Consult experts | Protects historical significance |
Step: Keep records
Why It Matters: Preserves provenance, value
Data Source: International Institute for Conservation (IIC) and Museum documentation standards (e.g. CIDOC): emphasize condition reports, treatment logs, and provenance documentation.
URL (CIDOC Guidelines): https://cidoc.mini.icom.museum/working-groups/documentation-standards/
Step: Consult experts
Why It Matters: Protects historical significance
Data Source: Getty Conservation Institute – Conservation Principles and Practice: stresses expert consultation for culturally or historically valuable objects.
URL: https://www.getty.edu/conservation/our_projects/field_projects/conservation.html
Can I use superglue for teapot repairs?
It's tempting, but typical superglue (cyanoacrylate) isn't always food-safe or heat resistant. If you must, save it for decorative-only repairs—not for teapots you'll be brewing and pouring from.
How long do repairs last?
With proper care, most repairs last a long time, sometimes 10+ years. In the end, it depends on the quality of the repair materials, the amount of usage (wear and tear), and your maintenance habits. Regular inspection and careful handling will prolong the life of both the teapot and the repair. Visible mending is growing quickly in popularity, in part due to some aspects of kintsugi. Many mend aficionados now highlight cracks with gold, silver, copper or even colored paint to create something beautiful. In this way the teapot flaunts its past rather than hiding it–and you end up with an honestly unique item. "A visible repair isn't a flaw. It is a badge of honor and a story worth telling"– Naomi Sato, Kintsugi Artist While almost anything might occur on your teapot restoration adventure, you'll be properly prepared by considering these answers.
Conclusion
Restoring a cherished teapot is about more than just mending broken ceramic—it's about preserving memories, embracing sustainability, and turning flaws into features. Through DIY pot teapot restoration: fixing chips, cracks, and more, you've learned how to identify your teapot's material, assess the damage, choose the right tools, and follow step-by-step methods to bring new life to a beloved piece. Whether you tackled a chipped spout, sealed a hairline crack, or reattached a wobbly handle, the process of restoration is both creative and rewarding. With finishing touches like thoughtful glaze work or a touch of kintsugi-inspired beauty, your teapot can become even more meaningful—standing as a testament to resilience and care.

Key Takeaways:
Encouragement: Don't let chips or cracks send your favorite teapot to the back of the cupboard. With the right knowledge and a little patience, anyone can master the art of DIY pot teapot restoration. Your handiwork will not only save money and reduce waste, but it will also add a personal chapter to your teapot's story—one you'll enjoy every time you pour a cup.


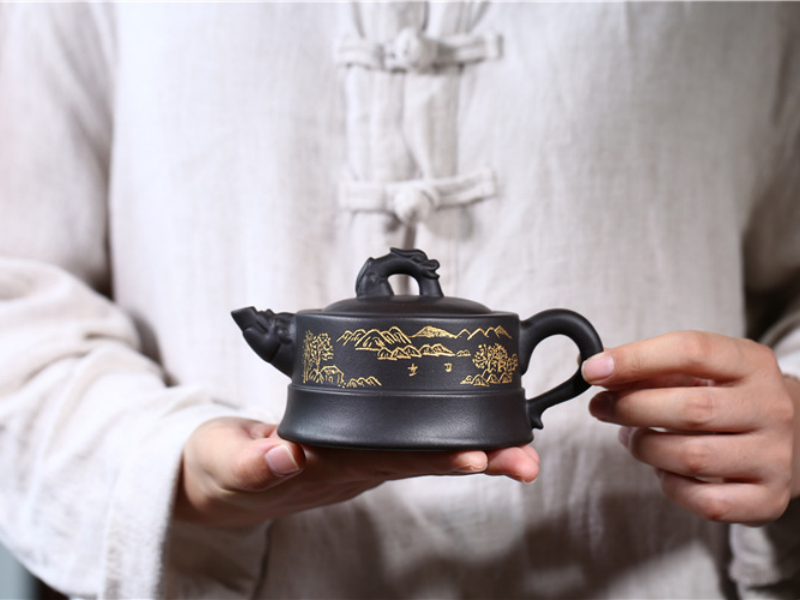
 chinese yixing zisha teapot with artistic glaze
  yixing ware teapots
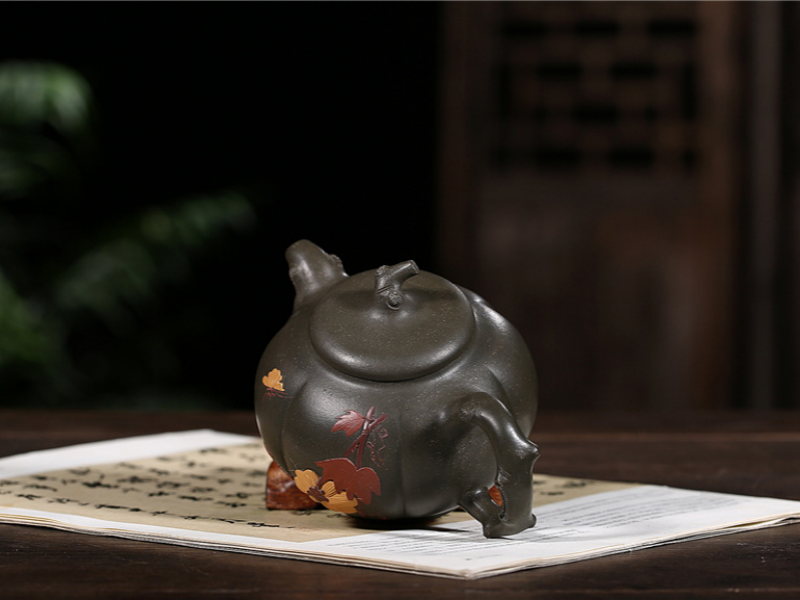