Easy Clay Teapot Ideas For Beginners: Step-By-Step Guide
Introduction
Have you ever wished that you could pour tea from a teapot you had made with your own hands? As someone new to pottery, making a clay teapot can feel like an overwhelming task but it’s actually the perfect beginner pottery project. You not only get to learn fundamental pottery skills, but you also end with a useful beautiful object you’ll either want to use every day or give to someone special in your life. In this complete step-by-step guide to how to make a teapot out of clay, you’ll find easy clay teapot ideas for beginners, see how to form and assemble your teapot, and discover tips that will help you make a teapot that’s approachable and fun.
Pottery has timeless appeal. The teapot, in particular, has become an international symbol of sharing and hospitality in many cultures. People are starting to take up clay as a hobby, and teapots are a popular first project because they are a neat combination of art and function. This step-by-step tutorial includes everything you need to know, from clay options to troubleshooting issues. Whether you want to make a traditional round teapot, a modern minimalist piece, or something fantastical, you’ll find useful tips, straightforward directions, and plenty of inspiration!
In the upcoming sections of this article
Quote of the day: “A teapot is more than just a vessel—it’s a celebration of craftsmanship, patience, and the joy of sharing.”
Fundamentals of a Clay Teapot

What Makes Clay Teapots Special
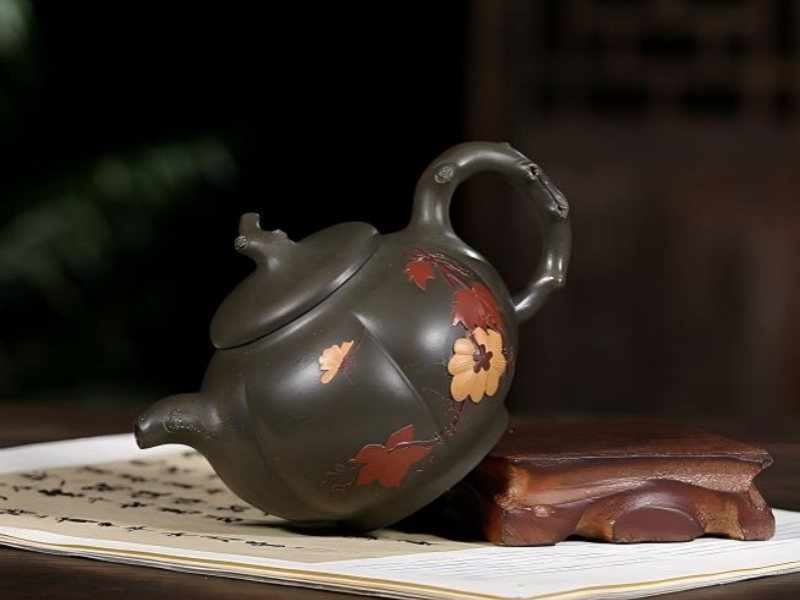
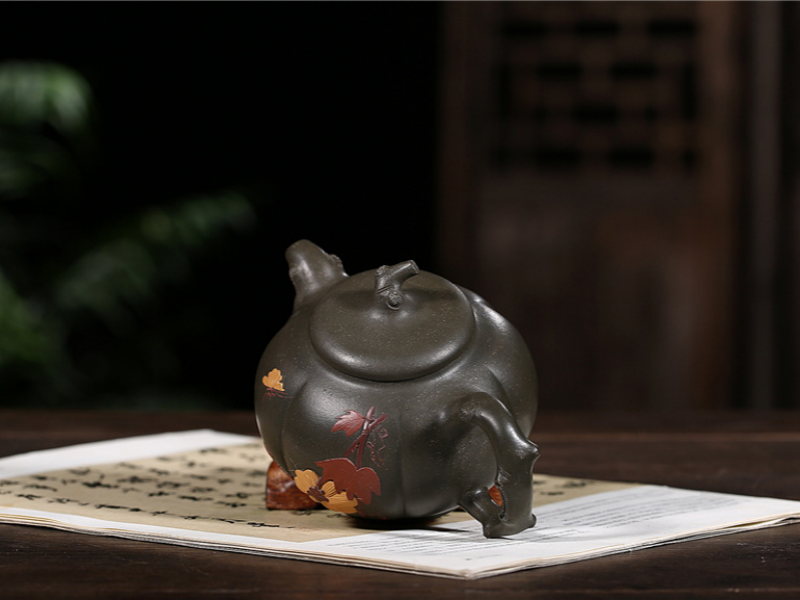
A clay teapot is much more than a receptacle for brewing tea—it is a living, breathing work of art whose story can be drawn into the shape, texture, and glaze of the final piece. Traditional clay teapots originate from ancient China; the famous Yixing teapots have been treasured for centuries for their ability to transform and enrich the flavors of tea with repeated use. For first-time teapot makers, however, the true joy of working with clay stems from its tactile nature: it is easy to mold, incredibly forgiving, and immensely expressive.
There are 3 common clay types used for teapots:
Earthenware: It fires at low temperatures and can often be porous if not glazed. It is easy to work with and favorable to beginners.
Stoneware: Mid- to high-fire clay that’s durable and holds heat well. This is a great choice for functional teapots
Porcelain: It fires at the highest temperatures and is smooth, but can be a lot more difficult for beginners to be able to be comfortable working with due to how delicate it can be.
The best clay to develop your first teapot is often stoneware — it’s generally sturdy, versatile, and easy to work with. Earthenware clay is perfect for decorative teapots, or for hand working with kids.
Clay Types Comparison
Clay Type Earthenware Stoneware Porcelain Firing Temp (°C) 950–1100 1200–1300 1200–1400 Porosity High Medium Low Best For Easy shaping, decor Functional teapots Advanced, fine details Fun fact: Stoneware teapots are often used in Japanese tea ceremonies due to their rustic appearance
Brief Intro to Teapot Shapes and Uses
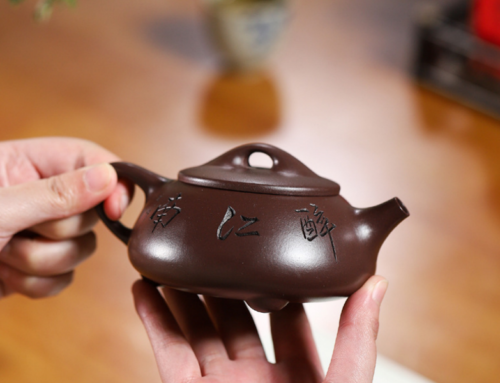
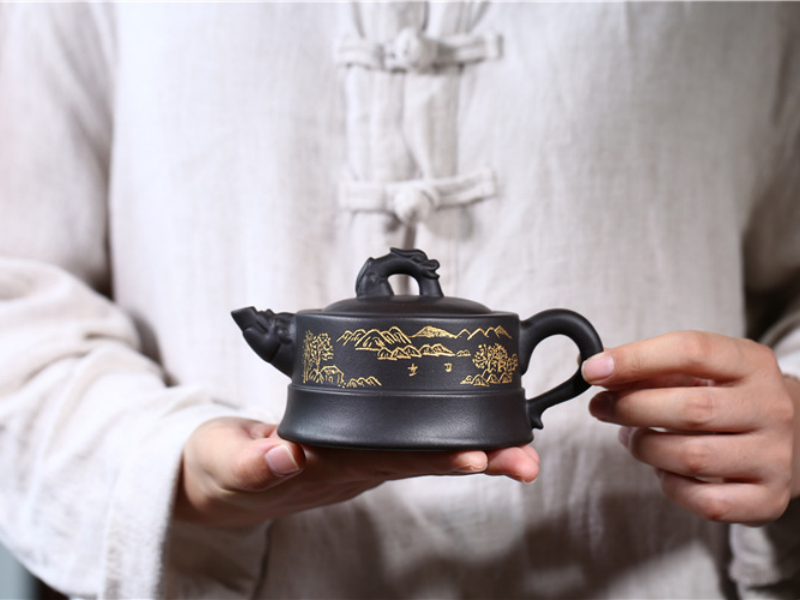
Teapots can come in endless shapes and sizes; however, for beginners, simple forms will be the easiest to build. When thinking of teapot forms, the classic teapot shape with a round body comes to mind first. A round teapot is a basic form that is not difficult to throw or build and pours well. Modern minimalist teapots are further stripped down and their simple clean lines are emphasized. On the flip side, a teapot can be made very whimsical: for example, it can be animal-shaped, have an exaggerated abstract form
Essential elements for any functional teapot include:
a body with sufficient volume for brewing
a spout properly attached and in line with the body for effortless pouring
a convenient handle
a tightly-fitting lid
A DIY clay teapot is not just for display – it’s a fully usable teapot you can make use of, and why not do so every day


Required Materials & Equipment
Prior to commencing your task, ensure you have all necessary materials. Below is an inventory of items required for easy clay teapot ideas
Basic Materials and Tools

Work in a well-ventilated area. Wear an apron or old clothes—it can get messy!
Don’t inhale clay dust. Clean using a damp sponge instead of sweeping.
Store any unused clay in a sealed bag to keep it soft.
Tip: Don’t worry about buying fancy tools. Household items (such as butter knives, old toothbrushes, or cookie cutters) make excellent alternatives for shaping and adding texture to clay
Choosing Your Teapot Style
Easy and Creative Clay Teapot Ideas
Choosing the appropriate design is one of the most important factors when you begin. The best easy clay teapot ideas for beginners include simple shapes that aren’t difficult for the potter but will still look good and useful as a teapot. Let me give a few examples that you can easily try out, so allow me to inspire you with fun but fitting clay teapot ideas for beginners:
The Classic Round Teapot:
A round body, a gently swaying spout, and a no-frills handle define this shape. The simple geometry in the 2D drawing corresponds to a forgiving geometry in the 3D form, making it a gratifying shape for a beginner to hand build. And the round form is generally forgiving of leaks or uneven pouring. Beginners also love how accommodating this teapot shape is, given that you can stop at the round oval or do more with texture on the surface, decoration or a glaze
Minimalist Teapot:
Looking for a teapot that has a modern feel? A minimalist teapot may be for you! Minimalist design focuses on simplicity of form. A straight-sided body, geometric handle, and fuss-free spout make up the design on this cup. Operation teapot is also simpler to assemble as you are dealing with uniform shapes. Minimalist teapots are a great way to try out bold glazes or explore subtle textures as they make a perfect blank canvas.
Fun Teapots:
If you’re just like to make something whimsical for fun, animal and nature inspired teapots are popular teapots with people starting out or want a create outlet. This might include teapots shaped like a cat, a pumpkin or a cloud. Again, the best way to keep things simple is by using a basic rounded or cylindrical teapot body shape and add small sculptural elements for ears, leaves etc.
Case Study: Maya decided on a classic round teapot for her first pottery teapot. Having settled on the design, she stuck to a fairly simple goal for her first teapot: to make a simple teapot that poured well. Maya was careful while making the teapot to avoid excess thickness, so she was able to keep the wall thickness fairly even throughout the process. In the end, the teapot did exactly what she wanted to—and she even designed a customized leaf-shaped knob for the lid. Her advice? “Don’t overthink things. Keep it simple—and you’re guaranteed to be impressed by what you create.”
Step By Step Instructions On How To Make A Clay Teapot
This is where the magic happens, where you roll out the frost your sleeves and start turning a basic lump of clay into a teapot that you would be happy to call yours. Here’s how each step looks like along with smaller practical steps and creative detail ideas to make sure your first clay teapot is not just functional but also beautiful:

Getting Your Clay Ready
Begin by wedging your clay. Wedging is the kneading of the clay to remove air pockets and ensure a homogenous mass. Air bubbles can cause your piece to crack or burst in the kiln, so this step is key! Knead your clay on a clean, non-stick surface (like a canvas board) for a few minutes, folding and pressing until it feels smooth and uniform.
Forming the Body of the Teapot
Hand-building the body of your teapot is a good idea, especially for a beginner. A wheel is not necessary and the pinch pot or coil methods both work very well.
Pinch Method:
Take a ball of clay, about the size of an orange.
Press your thumb at the center and gently pinch the clay into an even, outward bowl shape.
Keep pinching and smoothing until the teapot body is set to your satisfaction. The teapot walls should be no more than 1 cm thick, and fairly strong.
Coil Method:
Roll clay into long, even ropes.
Spiral up the coils, stacking and joining each layer.
Smooth the inside & outside with your fingers or rib tool to form you’re a seamless vessel.
Adding the Spout, Handle & Lid
Now’s the time to add character and function!
Making the Spout:
Roll a cone shape and hollow it out with a skewer or your finger.
Attatched the wide end to the body of the teapot. Score (scratch up) both surfaces and add slip before pushing together.
Tilt the spout up a bit–this helps keep it from dripping.
Use a needle tool to poke a hole from the inside of the teapot going to the base of the spout for the water to flow through.
Attaching The Handle:
Roll a fat coil and bend it just the way you’d like it to arch or loop.
Score and slip both handle ends and body before you attach them.
Press down firmly, then for added strength, blend the joints into one another with a damp finger or modelling tool.
Try the handle to make sure it’s comfortable, with no tight spaces for your fingers.
Forming the Lid:
Flatten a ball of clay into rounded pancake and press it into a circle that will fit the teapot opening. Add a small knob or loop to the top of the lid for ease of removing it.
If you’d like to have a tight fit, design a shallow flange (a small rim) on the bottom to hold the lid in place.
Putting it all together
When all the parts are complete, assemble the teapot.
Expert knowledge: “The biggest tip for a great beginner teapot is to be patient. Take each step slowly and deliberately, and don’t be afraid to try try again. The best pots usually come when something goes a bit wrong.”- Hiroshi Tanaka, pottery teacher.

Drying, Firing, and Glazing
Once your teapot is assembled and detailed, it’s time to help it transition from soft clay to a durable, usable vessel. This stage is all about patience and care—rushing can lead to cracks, warping, or weak spots. Here’s how to get the best results for your easy clay teapot ideas for beginners:
How to Dry Your Teapot Without Getting Cracks
Drying is an essential process. If clay dries too quickly, it is can kink. Or if it dries extremely slow, it can wallow. Place your teapot at a cool and shady area without direct sunlight or without drafts. Cover your pot with plastic loosely and let it dry. You can uncover the pot little by little in several days. Handles and spout are thicker than other parts of teapot. You can wrap plastic only for these parts and let them dry slowly another one day or two.
Bisque Firing Guidelines
You can bisque fire the teapot (i.e. put it through the first firing in the kiln) when it is bone dry. This first firing makes the clay hard and prepares it for glazing. Most community studios allow potters to rent access to their kilns for a small fee. You may also be able to fire the teapot at a local art school or with a community pottery group. If you own a kiln, then you can follow the firing schedule recommended by the clay manufacturer. Bisque firings are generally between 900 celsius (1650°F) and 1000°C (1832°F).
If you don’t have access to a kiln, you could use air-dry clay or oven-bake clay but neither of these are considered to be food-safe or waterproof, so you’d want to keep those teapots purely ornamental, or use them as planters or something like that. True ceramic teapots do require firing in a kiln to harden, seal, and become food-safe.
Glazing Tips and Easy Decoration Ideas for Beginners
Glazing is what gives your teapot its finished color, shine, and food-safe surface. Use a brush or dip or pour glaze on your teapot after bisque firing. Stick to simple things for your first go—single-color dipping or brushing is foolproof and straightforward.

After glazing, the teapot is fired again (1200–1300°C in the case of stoneware) in the kiln. The finished piece emerges fired, colourful and robust.
Basic Firing and Glazing Schedule:
Step Method Time Required Air drying Covered, slow 5–7 days Bisque firing Kiln, 900–1000°C 8–12 hours Glazing Brushed or dipped 30–60 minutes Glaze firing Kiln, 1200–1300°C 8–12 hours Quote: “Glazing is where the magic happens. Even simple colors can create stunning effects when applied with care.”
| Feature | Air-Dry Clay | Kiln-Fired Clay |
|---|---|---|
| Food Safe | No | Yes (with glaze) |
| Waterproof | No | Yes |
| Durability | Low | High |
| For Display | Yes | Yes |
| For Use | No | Yes |
Data Source: Evaluation based on ASTM C1161-18 (Standard Test Method for Flexural Strength of Advanced Ceramics) and guidelines from The American Ceramic Society regarding ceramic food safety and durability. Additional reference: U.S. Food & Drug Administration (FDA) guidelines on ceramic ware for food use (https://www.fda.gov/food/buy-store-serve-safe-food/ceramics-and-lead-poisoning).
Troubleshooting & FAQs
Even the most experienced potters occasionally have bumps along the way. If you’re new to making clay teapots, don’t let a few setbacks get you down. Every problem is an opportunity to learn. This section addresses the most common challenges of beginners, as well as answers the questions you’re most likely to have as you learn how to make easy clay teapot ideas for beginners.


