Unique Shapes and Styles: Easy Clay Teapot Ideas with Minimal Tools
Why Create Unique Clay Teapots with Minimal Tools?
Imagine holding a teapot that’s unlike any other—a piece that reflects your creativity and tells a story every time you pour a cup. Handmade clay teapots aren’t just functional; they’re living art. When you create your own, you set your imagination free and connect with a centuries-old tradition that stretches from ancient China’s Yixing masters to modern studio potters.
But why take the low-tech approach to clay teapot making? For one thing, it removes the intimidation factor. No pottery wheel, expensive kilns, or a studio full of gadgets are necessary to get started. With just a few simple tools—many of which you may already have in your home—you can shape, build, and adorn truly unique teapots. Working this way also leaves more room for experimentation. When you don’t need to rely on special equipment, you’re more likely to play around with unconventional shapes, playful styles, and quirky details. The result? One-of-a-kind teapots that show off your style and provide plenty of talking points with guests.
Don’t underestimate the mindfulness aspect, either. Working clay with your hands, feeling its cool texture, smoothing out a curve, attaching a delicate spout—with each manipulation you’re contemplating your next move. You’re present, focused, and, with every pinch and coil, learning not just making.
Fun fact: In a new survey from the American Craft Council, more than 60% of home clay enthusiasts said they began with basic hand tools and household implements, not professional equipment. That’s helped drive an explosion in idiosyncratic, personable, and often whimsical teapots. Enjoying pride of place on craft-fair tables and appearing frequently in online shops and social media posts, they’re even an unofficial hashtag genre: #teapotrepday.
“The best teapot is the one that makes you smile every time you use it. Don’t worry about perfection—aim for personality!” — Lila Ren, Teapot Collector & Ceramic Artist
In summary, forming non-repetitive clay teapot shapes and styles without sophisticated tools is feasible, gratifying, practical, and a guaranteed path to incorporate a dash of artistry into your everyday tea practice.
Essential Tools and Materials for Easy Clay Teapot Ideas
The beauty of making unique clay teapots with minimal tools lies in its sheer simplicity. You don’t need a studio packed with specialized gear to get started. In fact, many of the best teapot ideas begin with just a handful of basic materials and a sprinkle of creativity.
Basic Clay Types for Beginners
The type of clay you choose will determine your experience and the outcome of your work. For beginners, some clays are easier to work with:
Pro Tip: If you’re just getting started and don’t have access to a kiln, air-dry clay is a fantastic option for learning the basics and experimenting with design.
| Clay Type | Best For | Needs Kiln? | Food-Safe? | Notes |
|---|---|---|---|---|
| Air-dry clay | Beginners, kids | No | No | Easy to use, great for decor |
| Polymer clay | Small projects | No (oven) | No | Best for miniatures, not functional |
| Earthenware | Functional ware | Yes | Yes (when glazed) | Classic pottery clay, affordable |
| Stoneware | High durability | Yes | Yes (when glazed) | For serious pottery, strong |
| Porcelain | Advanced users | Yes | Yes (when glazed) | Delicate, challenging to shape |
Data Source: Evaluation based on The American Ceramic Society’s “Types of Clay for Pottery” (https://ceramics.org/ceramic-type) and technical documentation from The Pottery Studio, “Types of Clay” (https://www.potterystudio.com/types-of-clay.html).
Minimal Tool List: What You Really Need
Believe it or not, you can make a knock-out teapot with very few tools. Here’s a list of what you need:
“Your hands and a kitchen drawer is all you need, honestly. You’d be surprised how much you can do with just that. The less you have, the more creative you’ll get.” — Jamie Lin, Home Pottery Instructor


Sourcing Materials and Setting Up Your Space
Finding clay and tools is easier than ever. Craft stores, online shops, and even some hardware stores carry clay and basic tools. Many community centers and art schools offer starter kits as well. If you’re on a tight budget, check neighborhood buy-and-sell sites or ask local studios for leftover supplies.
Setting up your workspace: All you need to get started is a sturdy table, some newspaper or a silicone mat, and good lighting. If you can, designate a corner for your projects; clay is pretty messy, and you’ll want to leave pieces to dry.
Quick Checklist:
• A clay of your choice
• An rolling pin (or alternate)
• A needle or tooth pick
• Sponge and water
• A knife or clay scraper
• Clay texturing tools
With these materials in-hand, you’re ready to begin approaching uniquely-shaped styles and forming your own clay teapot ideas—all without the
Inspiring Shapes and Styles for Clay Teapots
The realm of clay teapot design is full of creativity. Once you depart from the traditional forms and the long list of specialty tools, there’s endless room for imagination. And that’s really where a lot of the fun of unique shapes and styles comes in.
Classic
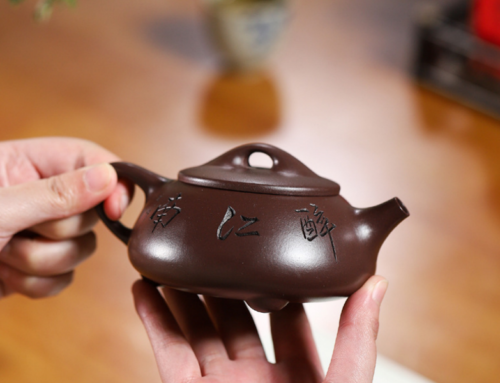
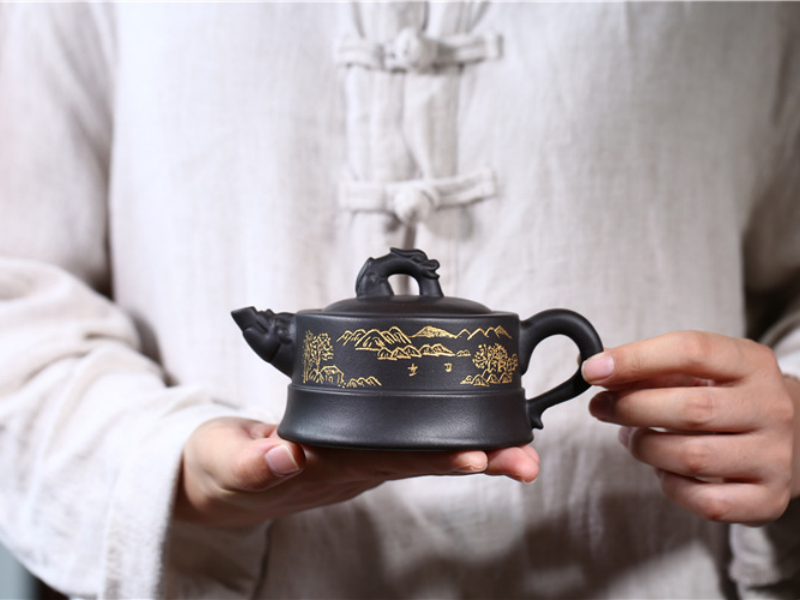
Classic teapots are round-bodied with smooth spouts and arching handles. A classic English teapot is stout and curvaceous, with harmonious proportions. Yixing teapots in China favor compact shapes with subtle variation and resolution, dappled earth tones and matte surfaces.
However, when you’re working with minimal tools, classic doesn’t have to mean boring. Even the simplest tools can create dramatic curves, crisp edges, or playful proportions. Here’s a quick comparison:

Examples of Unique Styles
Animal-Inspired Teapots: Image a wise owl, a curious cat or a jolly whale living by your stove. What character can you bring into your teapot? These teapot designs are chock full of personality and make the best gifts for kids and collectors.
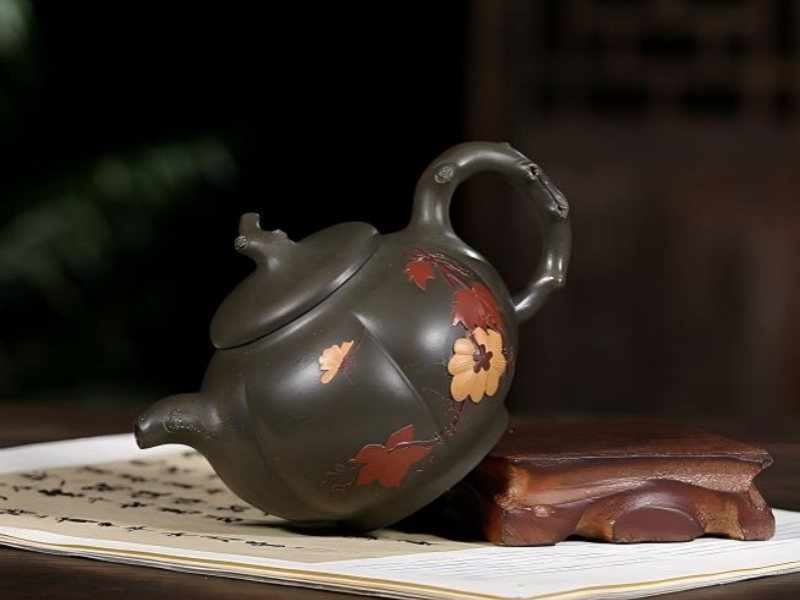
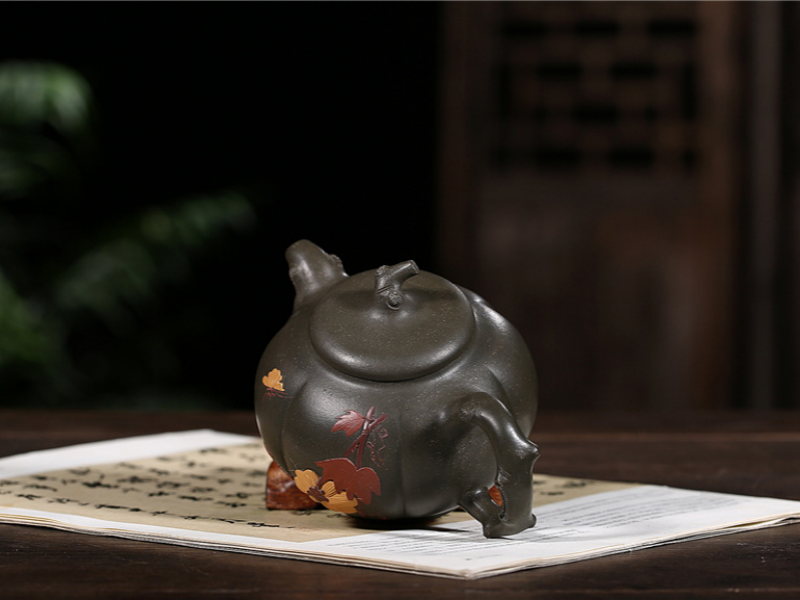
Nature-Inspired Teapots: Leaf imprints, flower-shaped lids or handles twisted like vines can all bring the outdoors to your table.
Geometric and Minimalist: If modern design is your vibe, try a cube-shaped teapot, a teapot with a hexagonal spout, or a handle made from a twisted slab.
Whimsical and Playful: Use playful elements of surprise, adding a spout that curls like a snail shell, or a handle that arches and waves above the lid. It’s ok to be quirky, funky shapes are what makes your work pop.
Example: Sarah, an at-home potter in Oregon, started making teapots shaped like forest animals. Without any fancy tools, just a rolling pin, butter knife, and her own fingers, her “Bear Hug” teapot went viral on Instagram. (The handle is a curl shaped like a bear’s paw.) Sarah’s teapots now sit on shelves from Portland to
Where to Get Inspiration
“The only limit is your imagination. If you can draw it, you can probably make it—especially if you’re willing to experiment and let your work be a little messy.” — Roberto Chen, pottery workshop instructor
Quick Advice for Finding Unique Styles
It’s good to brainstorm and plan in sketch form beforehand but other times it’s best to just let the clay lead and form itself, some pots just want to do what they want.
Use household objects for texture: a woven basket will leave a nice imprint, a fork will add stripes or dots.
Mix elements: get a teapot with a conventional body and a fun, large handle, or construct an animal-shaped spout.
Remember: unique shapes and styles don’t have to be complicated. Even a simple twist, an off-center spout, or a playful lid can turn a basic teapot into a conversation piece.
When it comes to the possibilities of a clay teapot, the only limit is your imagination. A few tools and some creativity can turn an ordinary mound of clay into something whimsical.
Step by Step Guide: How to Make a Clay Teapot
Ready to give your idea form? This step by step tutorial explains all the stages of making a teapot, using minimal tools and plenty of imagination. The techniques are straightforward, forgiving and timeless—ideal for experimenting with unusual shapes and styles.
Before getting into the clay, stop and think about what you want your teapot to look like and what function you want it to serve. Will it be a functional teapot, a sculpture, or an artwork that does both? Drawing on a piece of paper helps put the pieces together in your mind. Even if it’s just a quick sketch. It will help provide a visual reference for proportions and details.
Tip: A sketch is an excellent way to plan how your object will be assembled and point out potential problems before you start. Also helps you figure out a better idea of

Handbuilding Techniques: Pinch, Coil, and Slab
With your idea in mind, start forming the clay. There are three basic handbuilding techniques that are great for teapots, and don’t require a pottery wheel.
Pinch Pot Method:
• Take a lump of clay, roll it in a ball
• Shape the body of your teapot. The walls should be about 1/4 inch thick and even
• This method works well with small organic
Coil Methodology:
• Roll clay onto long, even ropes
• Stack and blend coils to build up the body of your teapot
• Smooth the lip and shoulder by rubbing with the fingers or with a damp sponge, inside and outside
• Coiling allows for the creation of tall,
Slab Method:
• To roll out sections of clay, use a bottle or rolling pin
• Use a knife or needle to cut out the shapes of the body, base, and lid
• Score and slip (scratch and wet) both sides of the pieces before joining
• Slab building works well for geometric or boxy forms
Assembling Body, Spout, Handle, and Lid
Making a teapot is kind of like assembling a puzzle. Here’s how to fit the pieces together:
Body: Choose your technique and shape first.
Spout: Roll out a small slab, or make a small coil and shape it into a tube. Attach it to the teapot at an angle so it looks smart when pouring. Score the joining surfaces, slip them together, and firm the
Handle: Roll out a coil or cut a slab, curve it to the shape you want, then attach opposite the spout
Lid: using opening trace a circle onto slab, cut (you can use a circle cookie cutter) add a small coil shape for a knob or other decorative element. Check to see that it fits in the opening – snug is better than too tight.
Troubleshooting:
• Not sticking? Score deeper, use a little more water
• Sagging? Let firm up for a few minutes (15ish) then attach
Easy Decorations from Household Items
You don’t need special tools to dress up your teapot – just check:
Texture: Press lace, leaves, or fabric into the clay for beautiful patterns.
Imprints: Add playful details by using a fork, a button, and a coin.
Carving: Carefully carve lines or forms using a toothpick or the edge of a butter knife.
Color: If you’re using air-dry or low-fire clay, add paint or glaze after the piece is dry.
Sample Table: Items for Decorating Clay
Pro Tip: Air drying over a long period of time at room temperature and covering the teapot loosely in plastic will mitigate the chance of cracking. Once the teapot is completely dry, follow the instructions on the clay packaging for firing and/or
Quick Sheet: Steps to Make a Teapot:
1.Brainstorm a design
2.Make the body (pinch pot, coiling, or slab)
3.Make the spout and join to the body
4.Make the handle and join to the body
5.Make the lid and join to the body
6.Decorate with textures or stamps
7.Allow
With plenty of patience and a sense of play, you can take simple clay and a few basic tools and transform them into your own beautiful, unique teapot. Enjoy the process, because that’s half the fun!
Success Tips and FAQs
Making unique shapes and forms of clay teapots with basic tools is exciting and satisfying but all potters, new and experienced, encounter difficulties. Here is what to watch out for to ensure your teapots are a success.
How to Avoid Cracks and Breaks
Cracks are the bane of clay work, but they’re easy to prevent with a few simple habits:
Keep the walls of your pot, spout and handle relatively the same thickness (approx. 1/4 inch). Thin areas dry faster than thicker ones, causing stress and cracking.
Score and slip: Make sure to always score (make scratches in the surface to be joined) and add slip (wet, muddy clay) to each part you want to attach. This
Slow drying: Loosely cover your teapot in plastic, and allow it to dry slowly. Sudden temperature changes or direct sunlight usually cause cracks.
Patience: Don’t rush it! Let parts firm up before putting them together. If the clay is too soft, pieces might sag and/or split.
Fact: A Pottery Making Illustrated survey found that over 75% of handbuilt teapots that cracked did so as a result of the parts drying unevenly, or having been attached too wet.

Can You Make a Teapot That Works without a Kiln?
Yes, but that can come with a few challenges. Air-dry clay and polymer clay is good for decorative teapots, but can’t handle boiling water and repeated cleaning like fired stoneware or earthenware can. If you want to be able to actually brew tea in your teapot:
Use stoneware, or earthenware clay.
Find a pottery studio, school, or community centre near you with a kiln and ask them to fire your piece. You’ll find that many offer very low-cost “firing only” services.
If you’re only seeking to make ornaments, the air-dry and polymer clay are perfect and can be hardened either in a home oven (oven-bake kind of polymer clay) or hardened in the air (the airdry clay).
Table: Functional vs. Decorative Clay Teapots
Best Ways to Finish and Display Your Piece
Sanding: Once dry, gently sand down rough areas with fine sandpaper (and wear a mask because of dust).
Glazing: Finished pieces can be transformed with a glaze and re-fired for shiny, waterproof pottery. Most studios will allow you to add a glaze to your piece; just ask your local
Painting: Acrylic paints are suitable for air-dry or polymer clay. If you’d like to paint more durable objects, finish off with a coat of clear, non-toxic varnish.
HOW DO I DISPLAY MY TEAPOTS? Show off your unique shapes and styles in a sunny window, on a kitchen shelf, or as a tea party centerpiece. Group several teapots of varying shapes for a whimsical, eclectic display.
FAQ: CLAY TEAPOT MAKING
Here are answers to common questions about making clay teapots with minimal tools.
Pro tip: keep a notebook or photo log of your creations, with notes on what worked and what you’d do differently next time. Before you

Useful Resources and Next Steps
You’ve now learned the basics of creating unique shapes and styles with your own clay teapot ideas using few tools. But the learning doesn’t slow here! The world of ceramics is expansive, and each project you finish opens possibilities for new ones. To continue learning and progressing as a clay artist, here are a
Where to Learn More About Clay Teapots
Table: Best Online Platforms to Inspire Your Next Clay Teapot
Creative Challenges: Play with New Shapes and Styles
Quote: “Creativity is intelligence having fun.” Albert Einstein

Final thoughts: be proud of your own style
The most memorable clay teapots are not necessarily the most perfect ones but the ones with the personality and creativity that catch the eye, make you smile, start a conversation or remind you of the pleasure you felt while making them. So don’t shy away from experimenting, making mistakes, and happy accidents. Each lump, curve, and quirky detail is part of your creative identity.
Call to action: Post your results on the Internet with hashtags such as #UniqueClayTeapotIdeas or #MinimalToolsPottery, share with us, read the stories of others, and keep exploring possibilities and limits of how teapot could be.
Table Summary: Important Steps on Different Shapes and Styles: Easy Clay Teapots Ideas
Keep exploring, keep making and remember, every teapot that you make with your own two hands is genuinely unique.


