Cracking the Code of Glazing – Learn how to add a finishing touch to your easy
Introduction
Imagine holding a clay teapot—still warm from the kiln, its body shimmering with gorgeously arranged layers of colors, patterns, and glassy surfaces. That siren’s first impression is achieved in large part from our work glazing. Glazing is the finishing step in crafting pottery that can elevate a simple clay teapot into a durable, functional work of art. But the act of glazing clay teapots (especially in easy clay teapot ideas) is something clay artists and potters feel often feel stuck on, whether it’s their first teapot or their thousandth. What glaze should you use? What process will lead to the perfect finish? And how can you achieve added color or aesthetics without running the risk of food-unfriendly cracks? In this guide, you’ll find everything you need to master glazing, from basic glaze chemistry to advanced finishing tips for uncomplicated clay teapots. You can expect practical guidance and simple explanations as well as a lot of inspiration. Whether you’re glazing your first teapot or looking to fine-tune your technique, you’ll learn actionable tips, expert insights, and answers to your biggest questions to make your clay teapots stand out on any table.
Glazing 101 for Clay Teapots
Diving into glaze for clay teapots is a field of science and art. Glaze, in its most simple form, is a glass surface fused to a pottery unit via a fire cycle. Glaze on a teapot fulfills many functions such as: waterproofing, food safety, and fabulous visual enhancements including matte and gloss surface finishes.


What is Glaze?
Glaze is a combination of silica (to promote glassiness), fluxes (to help the glaze melt), and alumina (to enhance stability), often mixed with metallic oxide coloring agents. When fired in the kiln, these ingredients melt and adhere to the clay surface, forming a coat that can be both glossy and glassy. In other words, a clay teapot that is not only durable, but elegant, to boot. As one potter put it, “Glaze is the magic that makes clay tell a story.”
How Glaze Changes a Clay Teapot
The application and type of glaze can change the entire personality of your teapot. For instance, a glossy clear glaze accentuates the clay’s natural color, whereas a matte glaze gives a teapot a contemporary, subdued look. Meanwhile, crackle glazes create a more antique feel by forming small, decorative cracks in the surface of the glaze. Different finishes will change the feel of a teapot in a person’s hand: glossy finishes are smooth and slippery, but matte glazes are soft and earthy. Functionality is important, too. The right glaze will create a protective, food-safe barrier to the clay, allowing you to brew and pour tea with peace of mind. Some glazes also have thermal properties that help keep your tea warmer longer.

Choosing the Right Glaze: Glossy, Matte, Crackle
Picking a glaze for your teapot isn’t merely about hue—it’s about finding one that aligns with your vision and your teapot’s function. Fact: According to The American Ceramic Society, glossy glazes are the most common for functional ware due to their easy-to-clean surface. Tip: To be safe with food, always look at the label for advice, especially if you’re going to use your teapot for brewing.
Why Teapot Glaze Is Important
A lot of of teapots are glazed, but teapots made of clay such as particular Japanese or Chinese clay teapots, may not be for a variety of reasons. Therefore, why glaze? Functionality: Your teapot’s glaze is not purely cosmetic. It’s to make your teapot functional for everyday use.
Prepping & Glazing Your Teapot: Step-By-Step
The preparation started before you even opened a pot of glaze. Proper preparation is your secret ingredient to a perfect finish. Rushing the preparation stage might lead to glaze peeling after firing, smudgy fingerprints, or matte spots dulling your piece. Let’s explain the methods of getting your clay teapot ready for glazing, and how to ensure your teapot designs come out as brilliantly as you imagined.
When Appropriate to Glaze Your Teapot
The ideal time to glaze your teapot is once it has been bisque fired. Bisque firing hardens fragile greenware into durable, slightly absorbent ceramic, which the glaze clings to. If your teapot is still rather friable or leaves a chalky dust on your hands, it is still in the greenware stage. Never skip bisque firing—raw clay will disintegrate under the glaze, ruining the piece and the kiln.
Even a fleck of dust or grease from a fingerprint will show up once the teapot is glazed and fired. So, keeping the teapot clean whilst glazing is crucial. Begin by gently rinding the teapot under clean water to remove any excess bisque dust. Allow the bisque to dry thoroughly, as damp bisqueware will cause the glaze to sit unevenly on the surface. Handle the teapot carefully with clean, dry hands. You may want to wear gloves to prevent oils from your hands getting onto the bisque surface. Pro tip: Just before you glaze your bisque teapot, wipe it with a slightly damp sponge. This picks up any invisible dust and helps the glaze adhere more evenly.

Applying Glaze: Brushing, Dipping, Pouring
Now we’re ready for the really fun part—applying our glaze! Each method can create different effects and so is better suited to different skill levels. Paint Brushing: Ideal for new leather crafters or to apply detailed designs. Load up a soft, wide paintbrush, and apply 2-3 thin layers. Allow each layer to completely dry before applying the next. Brush in a single direction to achieve an even layer. Dipping: this is usually the best way to get a nice all-over even coverage. Dipping works best if you’re aiming for a nice even single color finish, especially if your shape is relatively simple. You simply immerse your pot (teapot) in a bucket of glaze for enough time (2-3 seconds) and take it out. Let the excess glaze Pouring: Best for the inside of the teapot or when you want artistic drips. Pour the glaze into the teapot and swirl it around and pour the extra out. For the outside pour in from the top and let gravity do the rest. Fun fact: According to the Ceramic Arts Network: Most potters prefer dipping because of its rapid, uniformly repeatable results, but brushing tends to be used more often for decorative purposes where a greater degree of control, a wider range of effects and a larger palette of color
Common Mistakes to Avoid
Even the most seasoned potters fall victim to mishaps—it’s just a matter of learning what not to do! Glaze is applied too thickly. The glaze then runs or moves of its own accord. Glaze cannot stick to the pot and drips down onto the kiln shelf Missed spots: Lift your teapot up to a light to look for bare spots before firing. Glaze on the bottom: Always remove all glaze from the bottom and 1/4 up the side of the piece. If you don’t, your teapot will stick to the kiln shelf when you fire it! Case Study: One potter inadvertently left glaze inside the spout. After firing, it blocked the pour and the teapot was unusable. Use a small sponge or brush to keep spouts, lids and handles clear! With good prep and the correct application of glazing, you’ve already done most of the work. By now, you’ll have set your teapot up for a stunning, durable finish. Next, we’ll go over some ways to get creative with your glazing.
Stylize Glazing Tricks for Your Distinguishing Clay Teapot Ideas
As soon as you feel comfortable with the basics, you’ll be ready to explore some creative glazing techniques! Try some of these next-level techniques to make your clay teapot ideas one-of-a-kind!
Simple Layering and Color Combos for Eye-Catching Results
Layering glazes is one of potters’ favorite techniques for creating depth and vibrancy. By layering two or more harmonious glazes one after the other, you can create gradients, drips or unexpected color combinations. Try, for instance, brushing on a base coat of glossy blue, letting it dry, then applying a thin layer of matte white on top. The glazes will blend in the kiln, giving you a one-of-a-kind effect every time.
Wild Color Combos:
Fact: A pottery trend report published in 2024 named multi-layered glazes among the most shared teapot finishes on social media.

Masking and Wax Resist for Applying Designs
Masking and wax resist techniques are a great way of making clean lines and bold patterns, wax resist is a fluid wax that you paint on the pottery where you do not want the glaze to stick allowing you to glaze over the resist and the design the wax resist makes will still be visible, this allows contrast and clean vibrant patterns when fired. Wax resist techniques can be used to highlight and draw attention to the handle, lid, or feature of a piece. It can be used to create stripes and geometric patterns.
Simple Steps for Wax Resist:
Tip: Masking tape is also great to create straight lines or block off areas for color blocking. Make sure to remove the tape before firing.
Quick Tips for Fixing Drips or Uneven Glaze
Despite best efforts, glazes can drip, run, or pool off pots. But not to worry—most problems can be fixed before they’re fired: Drips: Allow the glaze to dry, then remove drips with a fine-grit sandpaper. Uneven spots: Use a damp sponge or brush to even it out to the right thickness before the glaze has time to dry. Bare patch? Dab on more glaze with a small brush. Case Study: A hobby potter found that she’d accumulated very heavy drips around the base of her teapot. After dipping her teapot glaze. Using a craft knife she was able to scrape away excess glaze before firing and avoided disaster sticking to the kiln shelf.
Add Texture and Visual Interest
Combine creative techniques for truly unique results. Try sgraffito—scratching patterns through a layer of colored underglaze to reveal the clay beneath. Or press textured materials (like lace or leaves) into the wet glaze for a one-of-a-kind, tactile surface. Expert Quote “Glazing is like jazz—you establish a base, then let the kiln improvise.” — Linh Tran, ceramic artist These clay teapot making ideas will transform a simple handmade clay teapot into a truly unique piece thanks to color and texture.

Firing & Finishing Touches
The magic of glazing really takes place in the kiln. Once you’ve applied your glaze, the high-heat firing process transforms your glaze and bonds it to the clay, revealing the final result of your easy clay teapot idea. Getting to know this stage is vital to create beauty and function.
What Happens During Glaze Firing?
Glaze firing occurs at higher temperatures than bisque firing, typically ranging from 1,900°F to 2,350°F (Cone 5–10, depending on the clay and glaze). As the temperature rises, the glaze materials begin to melt and fuse, forming a smooth, glassy coating that adheres firmly to the surface of the teapot. If special effects or layering were used, the kiln delivers surprises, with colors intensifying, blending, or breaking in unexpected ways.
Key Points:
Chart of common firing temperatures Firing Cone °F (Speed: approx) Common Uses 04 1,940 Bisque firing 5 2,167 Mid-fire glazes 10 2,345 Stoneware glazes.
Firing at the Correct Cone
Each glaze has a recommended firing temperature range—be sure to check the label. Most contemporary clay teapots get fired to Cone 5 or Cone 6, which is strong and durable. If you are using a specialty glaze or crackle glaze, be sure to follow the manufacturers advice—firing at too high or low of a temperature can ruin your design.
Quick steps:
Fun Fact: Some potters cut a peek hole plug (known as a spy hole) to check up on the glaze’s progress. But be careful not to open the kiln when it’s hot – thermal shock can lead to an instant crack in your teapot!

Food Safety and Functional Finishes
If your teapot will brew tea, it absolutely must be food safe. Only use glazes that are clearly labeled food safe. Crackle and metallic finishes should be avoided on any surface that comes into contact with food or drink. If you’re in doubt, conduct a glaze test or contact the manufacturer.
Checklist: Is your teapot food safe?
Finishing Touches:
Once your teapot comes out of the kiln, check for any sharp edges or rough spots. If necessary, gently sand them down. Be sure to thoroughly wash your teapot before its first use to remove any kiln dust that may have settled on it. With the firing done and the final embellishments sorted, your teapot is complete and ready to delight—each splash of a brew a tribute to your craftsmanship and imagination.
FAQs & Troubleshooting
Every potter – beginner to expert – faces tough challenges when glazing clay teapots. From unexpected results to technical errors, there are lots of questions potters have throughout the process. This section addresses the most common problems and concerns you might encounter with practical solutions to ensure the process of mastering glazing one easy clay teapot ideas a breeze.
Why Does My Glaze Look Dull or Streaky?
A dull or streaky glaze is usually caused by improper application or firing. If your teapot’s glaze lacks shine or is uneven, here are some things to look for: Glazed applied too thinly: Glaze must be applied in adequate thickness – usually 2-3 coats. Inconsistent brushing or dipping: overlapping brush strokes or irregular dipping may lead to streaks. Underfiring: When the kiln does not reach the recommended temperature, the glaze does not mature fully and is cloudy or matte. The Fix: Always shake, stir, or otherwise mix your glaze well, adhere to manufacturer’s labels, and check your kiln for accuracy with a separate pyrometer or witness cones.
Can I glaze without a kiln?
Glazing definitely requires the high and steady heat of a kiln to melt the glassy coating to your unfired clay teapot. Your home oven or toaster oven just can’t heat things to the First, see if there is a community studio in your area. There are loads of pottery and art centres popping up in communities that let people work in their studios and use their kilns. In addition, many mobile kiln services will come out to you if you have enough work for them Alternative: For teapots that are for decorative purposes only rather than functionally used for a teapot, then a cold finish could be applied to provide the apperance of a glaze; however, this will not be a viable substitute for a teapot to be use for
What’s the Best Way to Fix a Glaze Mistake?
Mistakes happen—but most are fixable before firing: Wipe off the excess glaze, allow the piece to dry, and then sand lightly with fine-grit sandpaper or a damp sponge. Patch bare spots: Use a small brush and extra glaze to touch things up. Free blocked spouts or details: clear glaze from tight areas with cotton swabs or pipe cleaner. The number of options is limited post-firing stage. Some potters refire their works with a fresh coat if the finish is not to their satisfaction, although the result can be rather hit or miss. For small imperfections, grin and bear it, it’s all part and parcel of their charm!
Quick Reference Table: Glaze Types for Clay Teapots
Glaze Type Look Best For Food Safe? Glossy Shiny, bright Modern Usually Matte Soft, muted Rustic Sometimes Crackle Textured, antique Decorative No Did you know? According to a survey by Ceramics Monthly, over 70% of potters say they’ve accidentally fired a piece with a glaze mistake at least once—so you’re not alone!

Conclusion
Mastering glazing for easy clay teapot ideas is an adventure, not a destination. With each teapot you make, you’ll discover new tricks, favorite color combinations, and perhaps a few happy accidents along the way. Remember, the real beauty of glazing lies in its unpredictability—no two teapots will ever be exactly alike. To recap: Start with a well-thrown, bisque-fired teapot Choose the glaze that matches your vision and intention. Apply successful careful glaze using methods and creative techniques that complement your skill and style. Fire with care and with any teapot servicing, food safety will be paramount! Approach troubleshooting with patience, as each problem is an opportunity to learn. So pick up your tools, embrace experimentation, and share your completed teapots with other makers. Each cup of tea you pour is a celebration of your unique artistry and the timeless tradition of handmade pottery.


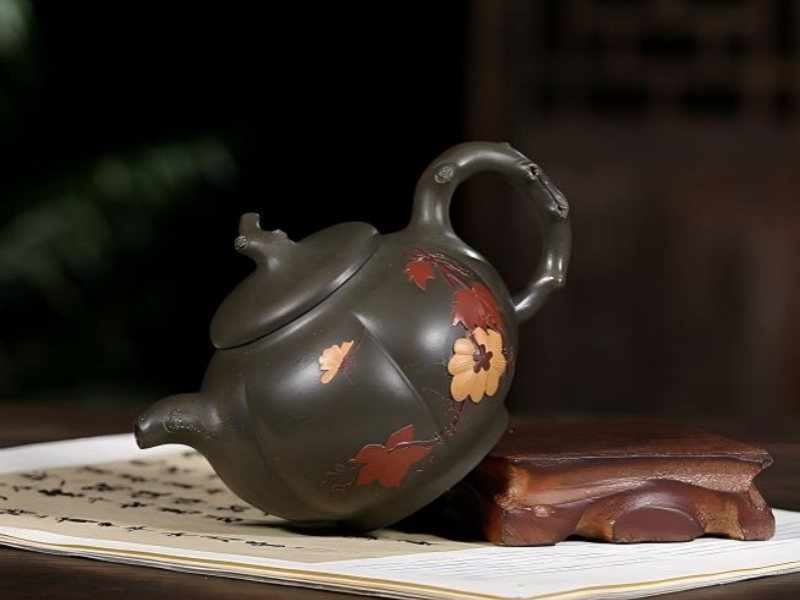
 Meditation Stone - Heat-Preserving Dicaoqing Clay for Jasmine Tea | Yserene
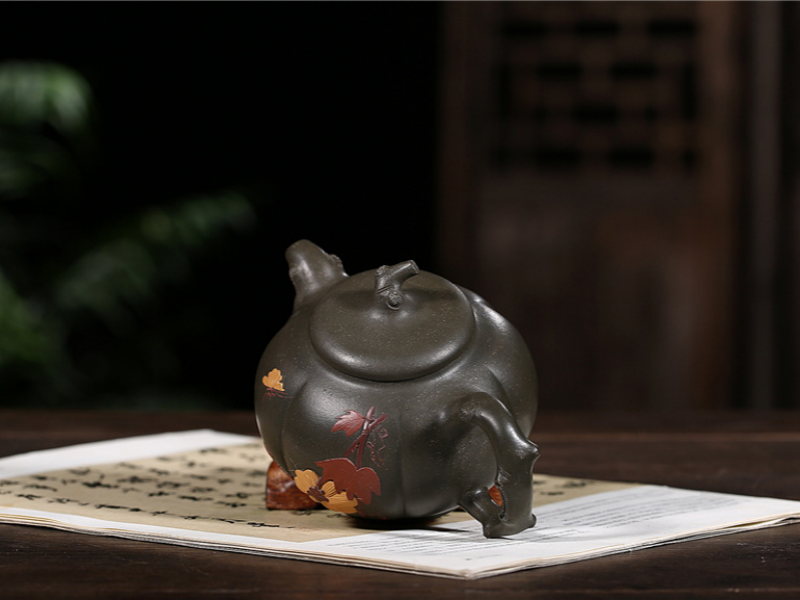