Troubleshooting Guide: Solving Common Problems in Easy Clay Teapot Ideas
Clay teapots hold a certain charm—a blend of artistry, tradition, and functionality that’s hard to find elsewhere. For beginners and hobbyists, crafting a clay teapot at home can be one of the most rewarding DIY pottery projects. Yet, as with any creative endeavor, easy clay teapot ideas sometimes come with their own set of headaches. Handles break off. Spouts leak. Lids don’t fit. And nothing frustrates a potter more than watching a beautiful creation crack in the kiln.
This Troubleshooting Guide: Solving Common Problems in Easy Clay Teapot Ideas will show you how easy it is to conquer your teapot problems. Whether it is your first teapot or you are struggling with a batch you’ve made over and over, we explore every challenge you may face carefully. We will guide you to overcome your challenges, offering concrete ideas, easy solutions, and the best advice, so you can get back to work and pour your next cup like nothing interrupted your flow!
Introduction
Nothing kills the excitement of a pottery project faster than seeing it go sideways. You might have pictured a gorgeous, hand-crafted teapot gracing your kitchen shelf. Instead, you’re staring at a cracked, leaky, or misshapen lump of clay. If this sounds familiar, don’t worry—you’re not alone. Even skilled potters have struggled with the basics at some point. The difference? They know how to troubleshoot, fix, and prevent those common problems.
This guide is your roadmap to smoother, more successful pottery sessions. We’ll cover the most common hurdles faced in easy clay teapot ideas, why they happen, and—most importantly—how you can solve them. From the right clay to use, to tips for perfect glazing, to actionable steps when things go wrong, it’s all here.


Why to make clay teapots at home?
What this troubleshooting guide covers
How this guide helps with easy clay teapot ideas
Whether you’re picking up clay for the first time or you’ve already fired a few wobbly teapots, this troubleshooting guide is packed with advice tailored to easy clay teapot ideas. You’ll learn how to spot warning signs before disaster strikes, fix mistakes on the fly, and end up with a finished teapot you’ll be proud to show off.
So grab your clay, roll up your sleeves, and let’s turn your teapot troubles into triumphs!

Easy Clay Teapot Ideas: A Quick Overview
Before tackling any problems, it pays to know the basics of easy clay teapot ideas—what materials you’ll need, which designs are best for beginners, and the major steps involved.
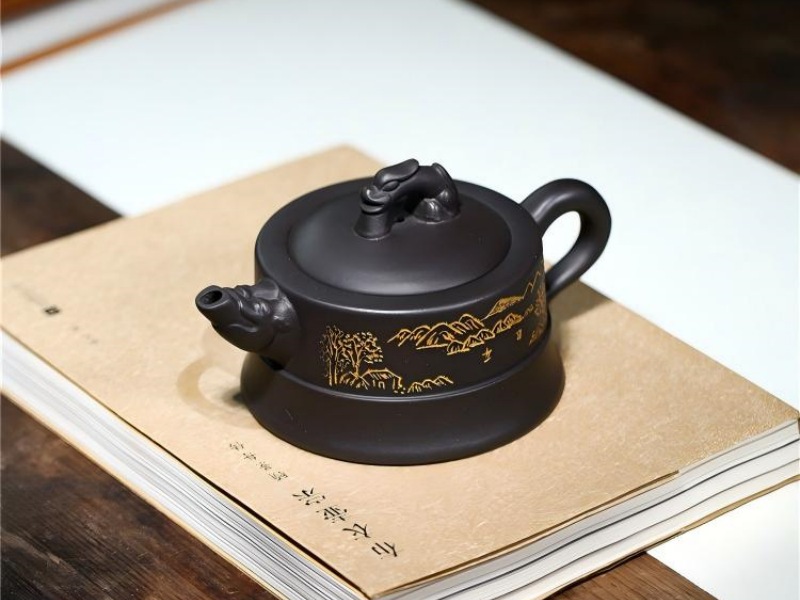
Clay teapots are a staple of home pottery because they’re both practical and fun to customize. Whether you dream of a classic round teapot or something more whimsical, your first step is choosing the right clay and understanding the process.
Best Clays for Teapot Beginners
No clay is made the same. You’ll need a clay that is easy to mold, strong, and food-safe after firing. Here is my quick comparison:
Pro tip: For your first few teapots, stoneware is a safe bet. It’s forgiving, strong, and can handle hot tea without cracking.
Basic Steps: Shaping, Attaching, Drying, Firing
The core steps for most easy clay teapot ideas look like this:
| Clay Type | Pros | Cons | Best For |
|---|---|---|---|
| Earthenware | Soft, easy to shape, low firing | Less durable, porous | Decorative teapots |
| Stoneware | Durable, food-safe, less porous | Harder to shape for newbies | Everyday use teapots |
| Porcelain | Elegant, fine texture | Tricky, prone to warping | Advanced projects |
Data Source: Evaluation based on The American Ceramic Society’s “Types of Clay for Pottery” (https://ceramics.org/ceramic-type) and technical documentation from The Pottery Studio, “Types of Clay” (https://www.potterystudio.com/types-of-clay.html).
Simple Teapot Designs that are Popular with Beginners

Checklist for Starting Your Easy Clay Teapot
Most Common Problems with Clay Teapots
Even the best creative easy clay teapot ideas can run into trouble from time to time. Knowing the most common mistakes not only saves you time, but teaches you valuable lessons as a potter, helping you develop and grow. Here’s the most common issues beginners and even experienced hobbyists face when constructing clay teapots.
| Problem | Suspected Cause |
|---|---|
| Peeling | Glaze applied too thick |
| Pinholes | Dust or oils on bisque, bubbles |
| Dull Finish | Underfiring, wrong glaze recipe |
Data Source: Evaluation based on The American Ceramic Society’s “Common Ceramic Glaze Defects and Solutions” (https://ceramics.org/education/resources-for-educators) and technical guides from The Pottery Studio, “Glaze Faults: Peeling, Pinholes, Dull Finish” (https://www.potterystudio.com/glaze-faults.html).
Cracking during drying or firing
Cracking. It’s the nemesis of every ceramicist. Cracks appear during drying, or worse, after firing turning your beautifully glazed teapot into a teapot watering can hybrid. The main causes of cracking: drying your teapot unevenly, too much water in your clay or firing the piece too rapidly. Cracks can be anywhere on the body, on the handle or worst still… around the spout! Cracks may be hairline or full splits.
Quick Facts:
Over 70% of beginners say cracking is their #1 frustration when it comes to pottery (Pottery Studio Survey, 2022).
The majority of cracks appear while the clay is drying, not when it is being fired in the kiln.
Handles or Spouts not Staying on
Nothing is more annoying for a potter than a carefully crafted handle or spout coming off, sometimes even before the pottery is put in the kiln. Attachment weaknesses have several causes. Many result from inadequate scoring and slipping, or joining pieces that are drying at a different rate than the main piece of pottery. In some cases, the handle or spout will even crack off during firing if stresses in the clay are not evened out between the pieces.
Leaks From Seams or Holes
A leaking teapot is not just an annoyance: it is unusable. Leaks can occur at seams, such as where the spout meets the body. Hairline cracks or even tiny pinholes can be present but unnoticable until the ware is filled with water. This pottery problem can also stem from insufficiently compressed clay or trapped air bubbles during construction.

Warping or Misshapen Teapots
Warping takes a round teapot and makes it oval, or worse, a teapot that wobbles and doesn’t sit flat. Warping is generally caused by overworking the clay, uneven drying, and wall thickness that are too thin. Warped lids that no longer fit are another common problem.
Common causes:
Glazing Problems: Peeling, Pinholes & Chalky Finish
Glazing can have you tearing your hair out in frustration. It seems so simple: just slosh or brush the glaze over your bisqued teapot. But glazing is just as much of a science and art as throwing or hand building. Problems such as peeling, pinholing, or a chalky finish can completely ruin an already ‘perfect’ pot. Most of the time these problems are caused by faulty glaze application, dust or oils on the bisqueware, or an incompatible glaze and clay body.
Table: Glazing Problems and Suspected Causes
Lid Doesn’t Fit Right
A loose lid that rattles on the pot or falls off when the teapot is poured can be a real nuisance, as can a tight lid that won’t come out once the teapot is glazed and fired. A poor fit is generally the result of measurement mistakes, but warping during drying or glaze buildup on the rim of the pot or the the lid can also cause problems.
“A teapot that pours well and has a snug-fitting lid is the sign of a thoughtful potter.” — Kenji Watanabe, Master Potter
Identifying these issues early is half the battle. In the next section, you’ll find specific troubleshooting tips and strategies for each of these problems, so you can translate your clay teapot ideas into beautiful, functional forms.

Troubleshooting Guide: Solutions for Each Problem
When you encounter a problem in your easy clay teapot ideas, the best step is to troubleshoot it quickly. Here are some ways to solve the problem and continue pursuing your craft.
| Problem | Quick Fix | Prevention Tip |
|---|---|---|
| Cracks | Score/slip, slow dry | Even thickness, slow drying |
| Loose Handles | Re-score/slip, support | Attach parts at same dryness |
| Leaks | Patch with clay, sealant | Compress seams, test before firing |
| Warping | Reshape at leather-hard stage | Dry on flat surface, rotate regularly |
| Glaze Issues | Wipe dust, thin coats | Test glazes, follow firing guidelines |
| Lid Fit | Adjust rim/coil, sand if tight | Dry lid with pot, mark orientation |
Data Source: Evaluation based on The American Ceramic Society’s “Common Pottery Problems & Solutions” (https://ceramics.org/education/resources-for-educators) and technical guides from The Pottery Studio, “Pottery Faults and How to Avoid Them” (https://www.potterystudio.com/faults.html).
Cracking Problems
Why it happens: Cracks occur when clay experiences excessive uneven drying, sudden temperature changes, or an abundance of water content. A lack of awareness surrounding slow and even drying is a common trait shared by most beginners, or they unknowingly hasten the firing schedule.
How to fix minor cracks:
When a crack appears on greenware, simply score a little along the edges of the crack, moisten (with water) and gently work a small amount of soft clay slip over the scored area. Smooth the surface with a damp brush.
For bisqueware (once a clay item is through it’s first firing) use a special ceramic repair paste. It’s not foolproof, but if you’re looking to save that decorative piece, it’s your best bet.
Handles and Spouts Coming Loose
Why they happen: The main culprit is usually something to do with scoring and slipping. A secondary reason is shrinkage between the handle/spout and body of the clay.
Immediate actions in case it’s not fired:
But carefully remove the breaking piece, score the two surfaces deeply and then put lots of slip on and repair. Support the piece with some sort of sponge or crumpled paper and leave until completely dry.
If the joint is resisting, add a small coil of clay and blend it into the seam.

Leaking Teapots
How to Test for Leaks:
After bisque firing fill the teapot with water and look for any leaks along seams or at the base.
Use a coloured liquid (such as diluted food dye) to make it easier to spot.
Greenware leaks vs. bisque leaks: solutions:
Greenware: Patch with moist clay and be sure to blend new fresh wet clay into already dry clay to achieve a seamless mend.
Bisque: Use a low-fire food-safe ceramic epoxy to fill tiny holes. Note that this option is best for decorative pottery rather than food-safe ware.
Sealing tiny leaks:
Sometimes a second glaze firing will seal very tiny pores.
For teapots that are not used for food, you can brush on a waterproofing sealer inside the teapot.
Did You Know: A properly compressed seam is far less likely to leak—always smooth and compress joints inside and out!
Warping and misshapen pieces
Common causes: uneven wall thickness, rough handling, or placing the teapot onto a bumpy surface.
How to delicately sculpt prior to eviscerating:
When leather-hard, use a combination of your hands and a soft paddle to coax the teapot back into shape.
Use a rounded template inside the teapot to preserve symmetry as it dries.
Glaze and Finish Defects
When glaze peels, blisters, or has a dull or matted appearance:
Peeling: Glaze is applied too thick; Dust still is on the clay
Blisters: Air was caught inside; Underfiring.
Tedium: Glaze unable to melt when fired to the correct temperature.
Solutions to glaze problems:
Wipe bisque-ware with a damp sponge before glazing to remove any pot dust.
Stir the glaze, glaze in thin, even coats.
Fire at the exact temperature your firing chart dictates. Don’t guess!
How to get a better finish:
Test various glazes on small pieces of tiles before committing to using them on your teapot.
For a glossy finish, opt for a transparent overglaze.
“Glazing is where art intersects chemistry. Even just a slight deviation in thickness or temperature can result in a huge difference.” — Sophie Ng, Ceramic Glaze Specialist

Lid Fitment Problems
How to Fix Loose or Tight Lid:
Before firing dry pots carefully check the fit of the lid on its container. If the lid seems loose, carefully add a thin coil of clay to the gallery (the ledge of the rim that the lid fits)
For a snug fit, gently carve away the rim of the piece when the clay is leather-hard, using a damp sponge or trimming tool.
Easy Ways To Improve Eyelid Fit:
Let the lid dry as it belongs, with the teapot, and never apart
Mark the orientation of the lid during forming and glazing so the it is refitted in the same orientation after firing.
Summary Table: troubleshooting at a glance
Armed with these troubleshooting steps, you’ll find that most clay teapot disasters are fixable—or even preventable!
Preventative Tips for Clay Teapot Success
The best way to deal with problems in your easy clay teapot ideas is to stop them before they start. Pottery thrives on careful habits and a few simple tricks that make a huge difference. Let’s break down the best preventative tips to keep your teapots sturdy, beautiful, and functional from the start.
Consistent Drying Methods
Uneven drying is the stealthy assassin of sculpture, responsible for most cracks and warps. You need patience and cunning to outwit it:
Fact: even professional studios lose fewer pieces to cracks by drying their work slowly under plastic for several days.
Securing Attachments
Handles and spouts are stress points—give them extra attention:
Pro tip: if you are unsure, allow the handles to sit in a plastic bag for 30 minutes and they should be about as dry as the body of the teapot.

Proper Glazing and Firing Habits
Glaze and firing errors are easy to avoid with some planning:
Chart: Common Firing Temperatures for Clay Types
Picking the Correct Tools for Beginners
Having the right tools can help make your first teapot successful:
“Start simple with your tools and build up as your skills grow. Even with the most basic of tools you can make a teapot you’ll be happy with.” — Alex Rivera, Pottery Teacher
These preventative tips are like an insurance policy for your clay teapot ideas—follow them, and you’ll avoid most of the common headaches that come with the craft.
Frequently Asked Questions (FAQs)
No matter how well prepared, some question keeps popping up whenever you are working on easy clay teapot ideas. That’s why we’ve answered the most frequent ones filled with tips that will help you save time and avoid frustrations.

Conclusion
Creating your own clay teapot isn’t just about following a set of instructions—it’s about embracing the process, learning from each piece, and finding joy in the craft. This Troubleshooting Guide: Solving Common Problems in Easy Clay Teapot Ideas has walked you through every major challenge, from cracks and leaks to glazing woes and fit issues. Along the way, you’ve seen that most mistakes are just stepping stones to mastery.
Remember, the way to success in this case isn’t perfection, but persistence. Slow your drying down, check your details when attaching parts, and don’t skip those glazing and firing steps. If you do find yourself in a bind, use the troubleshooting tips presented here as a guide. More than anything, give yourself some leeway and experiment. Some of the world’s most delightful teapots came into being by accident!
Key takeaways:
So, get your hands dirty, trust your hands, and let your creativity guide you. Armed with the right information and a dash of patience, your easy clay teapot ideas will soon have your home filled with warmth, creative spirit, and perhaps even a perfect brew.


